In Managing Image Mode for RHEL Using Satellite we went through a basic demonstration of provisioning and managing an Image Mode server using Red Hat Satellite. The solution uses Red Hat Satellite Lifecycle Management to control the deployment of our updates. Let’s have a look at a more complex container image that includes the following:
- a basic web application
- our Red Hat Satellite certificate
- OpenSCAP to manage the security standard and compliance of our container
- an Ansible automation user to help us automate day two operations
- Red Hat Insights software
- systemd services to automate Satellite and Insights Registration
Build server
We begin by provisioning a brand new RHEL 9.4 build server using our existing deployment process. We’ll use the ‘devuser’ account on the server to perform most of our tasks, prefixing anything with privileged with ‘sudo’ (in practice, you could refine the sudo rules to a very restrictive set). The server is registered to Satellite and is able to pull down the rhel9/rhel-bootc image from Satellite. When the server is provisioned, we install the tools we need:
sudo dnf install -y podmanThe Containerfile
We’ll create a file called Containerfile in the home directory for the devuser account. This contains our ‘recipe’ for building our Image Mode for RHEL container. The contents of the file is as follows:
# Bootable container webserver example
FROM satellite.london.example.com/example_organization-dev-test-rhel9-with-products-rhel-bootc-rhel9_rhel-bootc
ENV APP_VERSION=1.0.0
ENV APP_SUPPORT_TEAM="My Application Support Team"
ENV SATELLITE_CAPSULE_FQDN=satellite.london.example.com
ENV SSHPUBKEY="ssh-rsa ... [email protected]"
# https://gitlab.com/fedora/bootc/examples/-/blob/main/included-ssh-pubkey/Containerfile
# Add /usr/ssh to the search path OpenSSH uses for keys.
# Set SSH key for root user
RUN set -eu; mkdir -p /usr/ssh && \
echo 'AuthorizedKeysFile /usr/ssh/%u.keys .ssh/authorized_keys .ssh/authorized_keys2' >> /etc/ssh/sshd_config.d/30-auth-system.conf && \
echo ${SSHPUBKEY} > /usr/ssh/root.keys && chmod 0600 /usr/ssh/root.keys
# Install Apache and PHP
RUN dnf module enable -y php:8.2 && dnf install -y httpd php && dnf clean all
# Set Apache to start on boot
RUN systemctl enable httpd
# See notes from https://gitlab.com/fedora/bootc/examples/-/blob/main/httpd/Containerfile
# We want web content to come from our image not from /var which is machine-specific
# and able to be modified. We put contents into /usr which is readonly
RUN mv /var/www /usr/share/www && \
sed -ie 's,/var/www,/usr/share/www,' /etc/httpd/conf/httpd.conf
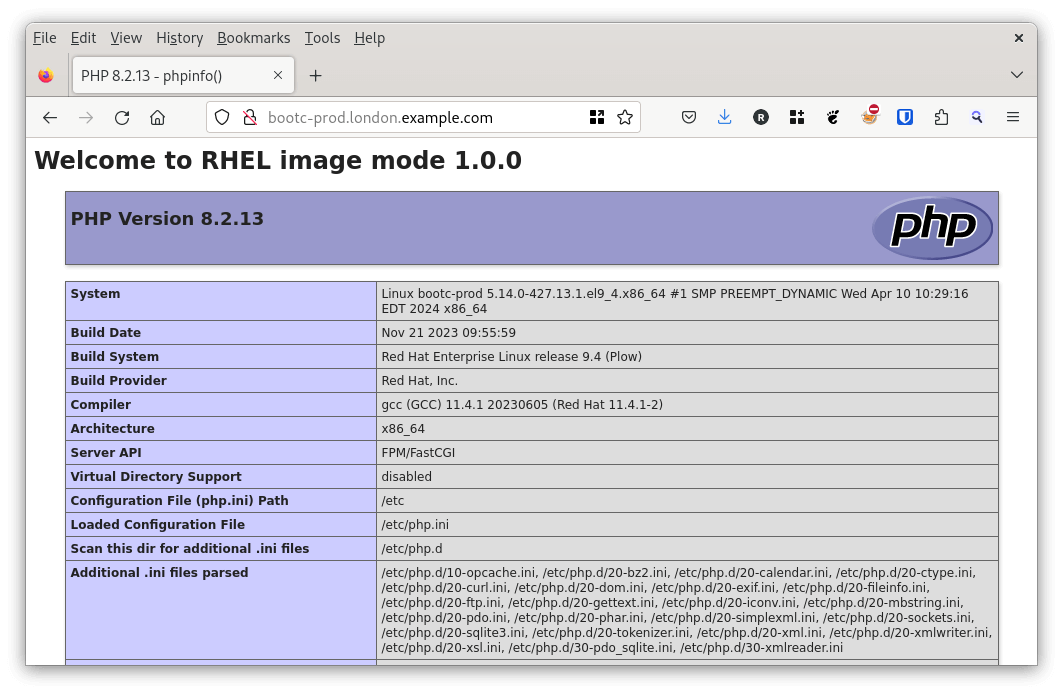
# Setup a simple home page with the version of the container in the header
RUN echo "<h1>Welcome to RHEL image mode $APP_VERSION</h1> <?php phpinfo(); ?>" >> /usr/share/www/html/index.php
# Install our Satellite certificate so we can register on first boot
RUN dnf install http://${SATELLITE_CAPSULE_FQDN}/pub/katello-ca-consumer-latest.noarch.rpm -y && dnf clean all
# Install the Insights Agent client and OpenSCAP tools
RUN dnf install insights-client scap-security-guide -y && dnf clean all
# Set Red Hat Insights tags to help us manage our images at scale
RUN echo "app_version: $APP_VERSION" > /etc/insights-client/tags.yaml && \
echo "app_support_team: $APP_SUPPORT_TEAM" >> /etc/insights-client/tags.yaml
# Modified from https://github.com/redhat-cop/rhel-bootc-examples/tree/main/insights
# Create a service that will attempt to register the server with
# Satellite and Red Hat Insights on first boot.
COPY rhc-connect.service /usr/lib/systemd/system/rhc-connect.service
# Note, it needs a /etc/rhsm/.rhc_connect_credentials file which includes
# a Satellite activation key. As we will use Lifecycle Management for updates and
# we want to use this same image across all lifecycles, we will create
# /etc/rhsm/.rhc_connect_credentials later once the server is provisioned
# If you wanted to always have the server register with the same activation
# key (eg to register to the Library) then uncomment the line below
# COPY .rhc_connect_credentials /etc/rhsm/.rhc_connect_credentials
# Enable the rhc-connect service and add the flag to run it at boot
RUN systemctl enable rhc-connect && touch /etc/rhsm/.run_rhc_connect_next_boot
# As we develop and increment our APP_VERSION we want /etc/insights-client/tags.yaml to
# be updated. Unfortunately, /etc is machine specific and won't be updated as this
# container is updated. We will include our application version in /usr/data/version
# and then have a systemd service read the contents and update
# /etc/insights-client/tags.yml
RUN set -eu; mkdir -p /usr/data && \
echo "app_version=$APP_VERSION" > /usr/data/environment && chmod 0644 /usr/data/environment
COPY update-insights-tags.service /usr/lib/systemd/system/update-insights-tags.service
RUN systemctl enable update-insights-tags.service
# So we can test locally, expose port 80
EXPOSE 80
# Test our own linting
RUN bootc container lint
There’s a lot of content in the above, but hopefully the comments help explain how our RHEL image is assembled. Some notes:
- We start from the latest version of the rhel9/rhel-bootc image that has been made available to us from our Red Hat Satellite server. We point to the Dev/Test version of the image here as we’re assuming we’re building from scratch, but another option might be to use the Production version if the organization policy states that all images must be built from an approved version of rhel9/rhel-bootc.
- We set variables for our Satellite server, our Application Version and our Application Support team. We use these last two variables in a couple of places and they are really useful as tags in Red Hat Insights.
- We add an SSH public key for the root account.
- We install Apache and PHP, and set httpd to start on boot. We alter the location from which content is server into /usr. This is because we want our content to be read-only from the image. If it were under /var it could be modified on each server we deployed to.
- We install the Red Hat Satellite Certificate and the Red Hat Insights and OpenSCAP packages
- We set tags for Red Hat Insights in the container
- We create a service called rhc-connect.service. At the time of writing, it wasn’t apparent how to have rhc work with Satellite, so this service runs subscription-manager and insights-client with appropriate arguments to register the server.
- We create a service called
update-insights-tags.servicewhich reads from/usr/data/environmentand updates/etc/insights-client/tags.yaml - Finally, so we can test the image locally, we expose port 80
Registering with Satellite and Insights
We create the file rhc-connect.service and place it in the same directory as the Containerfile. This systemd unit file will get run when the file /etc/rhsm/.run_rhc_connect_next_boot exists.
[Unit]
Description=Run subscription-manager and insights at boot
After=network-online.target
ConditionPathExists=/etc/rhsm/.run_rhc_connect_next_boot

[Service]
Type=oneshot
EnvironmentFile=/etc/rhsm/.rhc_connect_credentials
ExecStartPre=/usr/sbin/subscription-manager register --activationkey ${RHC_ACT_KEY} --org ${RHC_ORG_ID} --serverurl ${RHC_SERVER_URL}
ExecStart=/usr/bin/katello-rhsm-consumer
ExecStart=/usr/bin/insights-client --register
Restart=no
WatchdogSec=900
CPUQuota=30%
MemoryHigh=1G
MemoryMax=2G
TasksMax=300
BlockIOWeight=100
ExecStartPre=/bin/rm -f /etc/rhsm/.run_rhc_connect_next_boot
ExecStop=/bin/rm -f /etc/rhsm/.rhc_connect_credentials

[Install]
WantedBy=multi-user.target
Updating Insights tags according to the container version
We create the file update-insights-tags.service and place it in the same directory as the Containerfile. This systemd unit file will read the contents of /usr/data/environment and use the values to update /etc/insights-client/tags.yaml
[Unit]
Description=Update /etc/insights-client/tags.yaml from container
After=network-online.target

[Service]
Type=oneshot
EnvironmentFile=/usr/data/environment
ExecStart=/usr/bin/sed -i "s/app_version:.*/app_version: ${app_version}/" /etc/insights-client/tags.yaml
Restart=no
WatchdogSec=900
CPUQuota=30%
MemoryHigh=1G
MemoryMax=2G
TasksMax=300
BlockIOWeight=100

[Install]
WantedBy=multi-user.target
With the Containerfile, rhc-connect.service and update-insights-tags.service files in place, we are now ready to build our image.
Building our custom container Image
Building an image mode RHEL container is the same as building any other type of Container image. In this example, I will tag the image as 1.0.0 to match the APP_VERSION defined in the Containerfile
podman build -f Containerfile -t web-app:1.0.0It should take around 1 minute to build the image. Once complete, we can test it
podman run -d --rm --name webserver -p 8080:80 localhost/web-app:1.0.0 /sbin/initThe above command runs the container image with the name webserver, and binds our host port 8080 to the container port 80. We can check that httpd is serving the correct connect with curl -s localhost:8080 | head
[devuser@buildserver ~]$ curl -s localhost:8080 | head
<h1>Welcome to RHEL image mode 1.0.0</h1> <!DOCTYPE html PUBLIC "-//W3C//DTD XHTML 1.0 Transitional//EN" "DTD/xhtml1-transitional.dtd">
<html xmlns="http://www.w3.org/1999/xhtml"><head>
<style type="text/css">
body {background-color: #fff; color: #222; font-family: sans-serif;}
This is great – we see our “Welcome to RHEL image mode 1.0.0” as our HTML header. We can also explore our running webserver container.
[devuser@buildserver ~]$ podman exec -it webserver /bin/bash
bash-5.1# ps -ef | grep httpd
root          87       1  0 17:02 ?        00:00:00 /usr/sbin/httpd -DFOREGROUND
apache       115      87  0 17:02 ?        00:00:00 /usr/sbin/httpd -DFOREGROUND
apache       117      87  0 17:02 ?        00:00:00 /usr/sbin/httpd -DFOREGROUND
apache       118      87  0 17:02 ?        00:00:00 /usr/sbin/httpd -DFOREGROUND
apache       119      87  0 17:02 ?        00:00:00 /usr/sbin/httpd -DFOREGROUND
root         329     327  0 17:05 pts/0    00:00:00 grep httpd
We can now stop the container.
[devuser@buildserver ~]$ podman stop webserverBecause the podman run command included the --rm option, the container will be removed from the host’s filesystem when it stops.
Tagging and pushing to a registry
Now that we have version 1.0.0 of our application running and we’re happy with the contents, we want to make it available in Satellite so that we can build servers from it. We can’t push to Satellite directly, but we can push it to a local container registry we have running on our network. In our testing deployment we’ll push it to our private Ansible Automation Hub but it can go to any registry that you might have available in your environment such as Nexus, Artifactory, Pulp, Harbor, Quay, etc.
In the commands below we login, tag and push our image as ‘latest’ and ‘1.0.0’ to our registry running at hub.london.example.com
podman login --tls-verify=false hub.london.example.com

# Optional, show existing images
podman image search --tls-verify=false hub.london.example.com/


podman image tag localhost/web-app:1.0.0 localhost/web-app:latest
podman image tag localhost/web-app:1.0.0 hub.london.example.com/web-app:1.0.0
podman image tag localhost/web-app:latest hub.london.example.com/web-app:latest
podman image push --tls-verify=false localhost/web-app:1.0.0 hub.london.example.com/web-app:1.0.0
podman image push --tls-verify=false localhost/web-app:latest hub.london.example.com/web-app:latest
Finally, we can confirm the image is on the registry.
[devuser@buildserver ~]$ podman search --tls-verify=false --list-tags hub.london.example.com/web-app
NAME                            TAG
hub.london.example.com/web-app  1.0.0
hub.london.example.com/web-app  latest
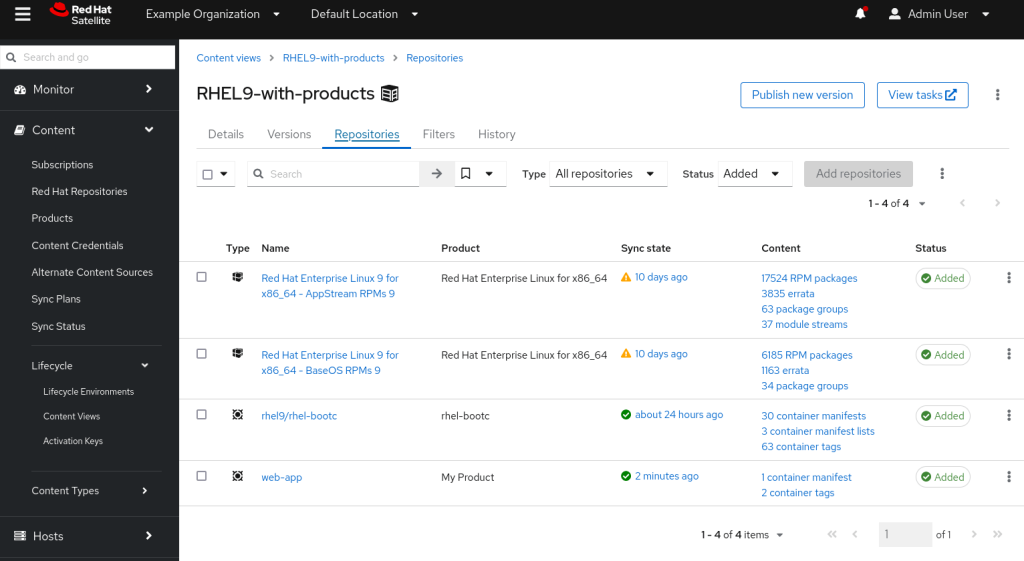
Syncing our container to Satellite
Within Satellite, we’ll create a brand new product for our set of custom builds, and then sync our first container to it. The idea is that over time you might have a structure that looks like this:
| Product | Repository |
| My Product | web-app |
| My Product | api-app |
| My Product | data-processing-app |
| Third Party Company 1 | cool-app |
| Third Party Company 1 | bespoke-app |
| Third Party Company 2 | new-app |
Essentially you will have ‘sets’ of container images from various sources.
We can use Ansible to create our products and repositories using the approved Red Hat Satellite Ansible Collection.
---
- name: Configure custom RHEL Image mode products and repositories
  hosts: all
  connection: local
  gather_facts: no
  collections:
    - redhat.satellite
  vars:
    satellite_admin_user: admin
    satellite_admin_password: !vault |
      $ANSIBLE_VAULT;1.2;AES256;
      3763656136XXXX
    my_satellite_product:
      - name: My Product
        label: my-product
        description: My Products
        organization: Example Organization
    my_satellite_repository:
      - name: web-app
        label: web-app
        description: My Web Application
        organization: Example Organization
        product: My Product
        content_type: docker
        url: "https://hub.london.example.com"
        docker_upstream_name: web-app
        unprotected: true
        upstream_username: admin
        upstream_password: !vault |
          $ANSIBLE_VAULT;1.2;AES256;
          37636XXXX
        download_policy: on_demand
        mirroring_policy: mirror_content_only
        verify_ssl_on_sync: false
        exclude_tags: "*-source"

  tasks:
    - name: Check satellite_admin_password is provided
      fail:
        msg: satellite_admin_password needs to be supplied
      when:
        - "satellite_admin_password is not defined"

    - name: Set Katello URL
      set_fact:
        satellite_url: "https://{{ inventory_hostname }}"

    - name: "Configure Products"
      redhat.satellite.product:
        username: "{{ satellite_admin_user }}"
        password: "{{ satellite_admin_password }}"
        server_url: "{{ satellite_url }}"
        organization: "{{ product.organization }}"
        name: "{{ product.name }}"
        description: "{{ product.description }}"
        label: "{{ product.label }}"
      when: product is defined
      loop: "{{ my_satellite_product }}"
      loop_control:
        loop_var: product

    - name: "Configure Repositories"
      redhat.satellite.repository:
        username: "{{ satellite_admin_user }}"
        password: "{{ satellite_admin_password }}"
        server_url: "{{ satellite_url }}"
        organization: "{{ repository.organization }}"
        name: "{{ repository.name }}"
        description: "{{ repository.description }}"
        label: "{{ repository.label }}"
        product: "{{ repository.product }}"
        content_type: "{{ repository.content_type }}"
        url: "{{ repository.url }}"
        docker_upstream_name: "{{ repository.docker_upstream_name }}"
        unprotected: "{{ repository.unprotected }}"
        upstream_username: "{{ repository.upstream_username }}"
        upstream_password: "{{ repository.upstream_password }}"
        download_policy: "{{ repository.download_policy }}"
        verify_ssl_on_sync: "{{ repository.verify_ssl_on_sync }}"
        mirroring_policy: "{{ repository.mirroring_policy }}"
        include_tags: "{{ repository.include_tags | default(omit) }}"
        exclude_tags: "{{ repository.exclude_tags }}"
      when: repository is defined
      loop: "{{ my_satellite_repository }}"
      loop_control:
        loop_var: repository
One nice thing here is we can version control the above playbook and update it as we add more products and repositories. Once setup, we can synchronise the web-app repository by adding the following task to the playbook:
    - name: "Sync Repositories"
      redhat.satellite.repository_sync:
        username: "{{ satellite_admin_user }}"
        password: "{{ satellite_admin_password }}"
        server_url: "{{ satellite_url }}"
        organization: "{{ repository.organization }}"
        product: "{{ repository.product }}"
        repository: "{{ repository.name }}"
      when: repository is defined
      loop: "{{ my_satellite_repository }}"
      loop_control:
        loop_var: repository
Make the container available to our Life Cycle Environments
Now that the repository is synchronised, we can add the ‘web-app’ container repository from ‘My Product’ to the content view. We don’t need to create filters on the repository (although we could) – when we publish a new version of the content view versions ‘latest’ and ‘1.0.0’ of our web-app will be made available.
Verifying the image from Satellite
Once the content view has been published and promoted to our Dev-Test Lifecycle environment we are able to query Satellite and inspect the image before we use it:
[devuser@buildserver ~]$ podman search --list-tags satellite.london.example.com/example_organization-dev-test-rhel9-with-products-my-product-web-app
NAME                                                                                               TAG
satellite.london.example.com/example_organization-dev-test-rhel9-with-products-my-product-web-app  1.0.0
satellite.london.example.com/example_organization-dev-test-rhel9-with-products-my-product-web-app  latest

[devuser@buildserver ~]$ skopeo inspect docker://satellite.london.example.com/example_organization-dev-test-rhel9-with-products-my-product-web-app
{
    "Name": "satellite.london.example.com/example_organization-dev-test-rhel9-with-products-my-product-web-app",
    "Digest": "sha256:374d6b11462f8656aad1e220d9be0aa774735ab038243ef97df6eed55bfdbd3e",
    "RepoTags": [
        "1.0.0",
        "latest"
    ],
    "Created": "2024-05-29T16:58:48.993275182Z",
    "DockerVersion": "",
    "Labels": {
        "containers.bootc": "1",
        "io.buildah.version": "1.33.7",
        "org.opencontainers.image.source": "https://gitlab.com/redhat/rhel/bifrost/rhel-bootc.git",
        "org.opencontainers.image.version": "9.20240501.0",
        "ostree.bootable": "true",
        "ostree.commit": "409e7242d545edbdd445f0b5a874a37c716fc84c647fe5c257fb1bf731c69a65",
        "ostree.final-diffid": "sha256:12787d84fa137cd5649a9005efe98ec9d05ea46245fdc50aecb7dd007f2035b1",
        "ostree.linux": "5.14.0-427.13.1.el9_4.x86_64",
        "redhat.compose-id": "RHEL-9.4.0-updates-20240423.62",
        "redhat.id": "rhel",
        "redhat.version-id": "9.4",
        "rpmostree.inputhash": "50c79cb2a001e0f65dc21c2619451b9bd27f1fd21018733ddf19124372aba30c"
    },
    "Architecture": "amd64",
    "Os": "linux",
    "Layers": [
        "sha256:d672a0d9c32d7e64e62fba6d3b1192f5648a60abd37d423daed3efd8ae0acea5",
        "sha256:cb70cdc95b0d0c649bb0559a39bb3a0a7c6cf8f1904d212ec159d58c08303e6e",
....
    "Env": [
        "PATH=/usr/local/sbin:/usr/local/bin:/usr/sbin:/usr/bin:/sbin:/bin",
        "APP_VERSION=1.0.0",
        "APP_SUPPORT_TEAM=My Application Support Team",
        "SATELLITE_CAPSULE_FQDN=satellite.london.example.com",
        "SSHPUBKEY=ssh-rsa ... [email protected]"
    ]
}
Summary
In this article we’ve gone through the process of creating a custom RHEL image based on rhel9/rhel-bootc. We used a build server to consume content from Red Hat Satellite and we used the same build server to confirm that the application worked as expected. The container has new systemd service which will allow it to register with Red Hat Satellite and Insights. Following a successful build and test, we pushed the container to a registry. After creating a new product in Red Hat Satellite we synchronised the registry which added our image to Satellite. We added the container to the Lifecycle environment, promoted it to our Dev/Test area and confirmed it’s available to us.
In the next post we’ll create a bootable disk image and then building a new server and examining it with Red Hat Insights:
Note
This post is not endorsed or affiliated with Red Hat – the information provided is based on experience, documentation and publicly available information. Feel free to leave feedback at the end of this page if anything needs correction.
For an up to date roadmap discussion on Image Mode for RHEL please contact your Red Hat Account rep.